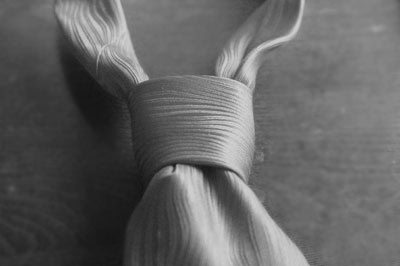
The Windsor knot, or the Full Windsor, is the largest of the four most popular necktie knots. Stemming from the royal heritage of the English, this knot enjoys a large prestige when worn. Therefore it is largely a power knot for business.

A Closer Look at the Windsor Knot
The Windsor is a very large symmetrical triangular shaped knot. While the knot is self-releasing, it does not slip when tied correctly. The loops which form the back of the knot allow a bit of space between the collar line and the necktie making the Windsor very comfortable to wear. However it only works with certain types of men’s shirt collars.
The History of the Windsor Knot
Folklore says that the Windsor was handed down to the royal family from King George V along with the crown jewels. The Windsor knot is often believed to be named after the Duke of Windsor (Edward VIII) who preferred a wider, thicker knot. However, the knot is actually attributed to his grandfather, Edward VII.
The Windsor knot also carries a bit of controversy. In the 20′s and 30′s, America fell in deep infatuation with all things fashionable that the Duke (at that time Prince Edward) did. When the the Windsor knot was demonstrated in 1936 two steps were reversed. This created an impossibly complex knot. Whether created as a hoax, or not has never been truly known. But it has led to the mistaken belief that the Windsor knot is exceedingly difficult to tie. However the steps below show this is not so.
How to Tie the Windsor Knot
Step One: Begin with the wide end of the tie on the right side, quite a bit lower than the narrow end. Because the Windsor uses so much material, try 10 to 12 inches.
Step Two: Cross the wide end over the narrow end. Continue this motion by passing the wide end under the narrow end forming a loop around it. Pull firm.
Step Three: Pass the wide end of the tie under the loop you just made. You will now have the underside of the tie showing on the right side.
Step Four: Loop the wide end of the tie over the narrow end again on the right side. Pull this tight as well. You will now have a loop on either side which begins to look like a triangle.
Step Five: Bring the wide end of the tie over both of the loops from right to left. This will form the front of the triangle.
Step Six: Continue by bringing the wide end of the tie between the necktie and the collar line. Tuck this through the loop that you just formed.
Step Seven: Tighten the knot by pulling down gently on the wide end of the tie with one hand and moving the knot up with the other. Don’t forget to straighten and form the dimple.

No comments:
Post a Comment